Khi làm việc với bản vẽ AutoCad thì việc chỉnh sửa thường xuyên là không thể tránh khỏi. Trong một số trường hợp thì chúng ta cần phải so sánh sự khác nhau giữa 2 bản vẽ để biết được mình đã sửa những gì. Một trong những tính năng rất hữu ích của AutoCad dùng để kiểm tra sự thay đổi của bản vẽ, đó là chính là tính năng so sánh 2 bản vẽ: DWG Compare.
Để mở tính năng này các bạn chỉ cần vào phần View, chọn DWG Compare sau đó chọn bản vẽ mà bạn cần so sánh.
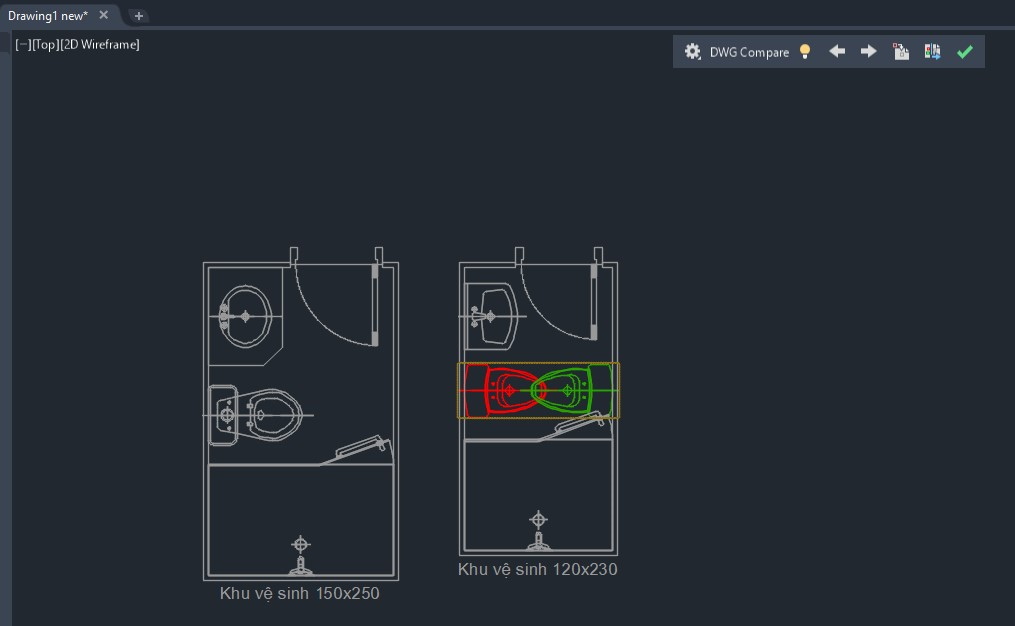
Khi so sánh 2 bản vẽ thì bạn chú ý các màu sau:
Màu xám: Bản vẽ không có gì thay đổi.
Màu xanh lá cây: Các đối tượng mới.
Màu vàng: Các đối tượng có thay đổi, sửa chữa.
Màu đỏ: Các đối tượng đã bị xóa.
As persons who often work on AutoCAD drawings, sometimes we need to check for the difference between the drawings. One of the most useful tools that we can use for this purpose is DWG Compare. In order to open this tool, you just need to go to the View tab, choose DWG Compare and then import the drawing that you want to compare.
When doing a comparison task you need to notice these colors as they have different meanings:
Grey: The objects are the same.
Green: New objects in the drawings.
Yellow: The objects have been adjusted.
Red: Deleted objects.
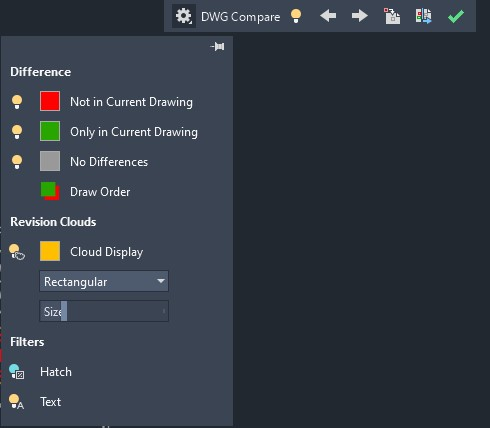
Ngoài ra thì chúng ta cũng cần lưu ý những tính năng sau:
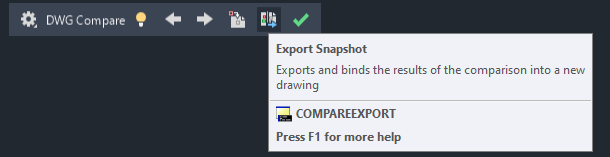
- Export Snapshot: Xuất bản vẽ so sánh ra file Cad.
- Cloud display: Chọn Rectangular hoặc Polygonal là hình dáng đường bao.
- Filter: Tắt hoặc mở hatch, text trong file
Moreover, we also need to know some other functions such as:
- Export Snapshot: It is very useful to export a comparison drawing.
- Cloud display: Choose the Rectangular or Polygonal for the shape of the borders.
- Filter: Turn on or turn off the hatch or text in the file.